Pictures and text here are provided courtesy of Doug Lyle.
See more of Doug's cars at http://www.dougscars.com
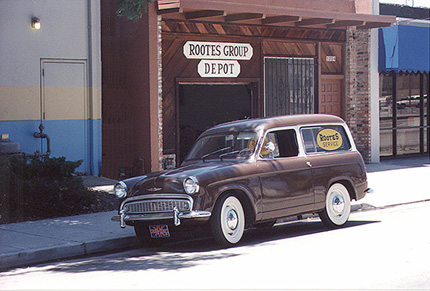
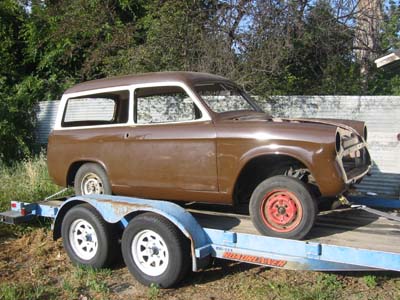
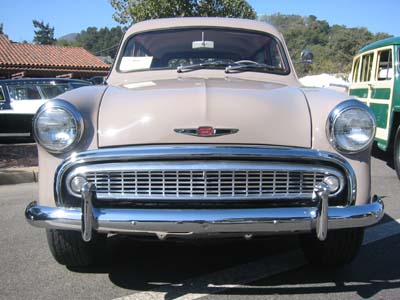
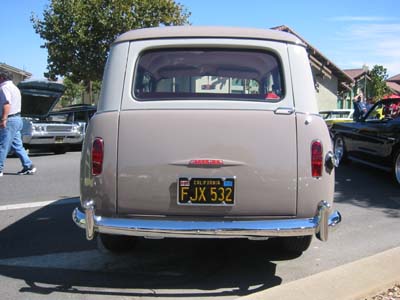
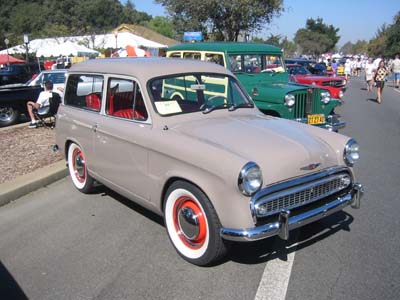
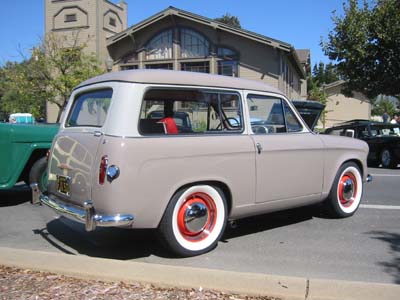
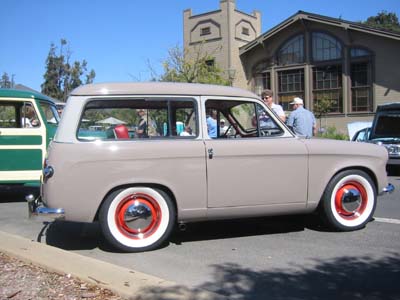
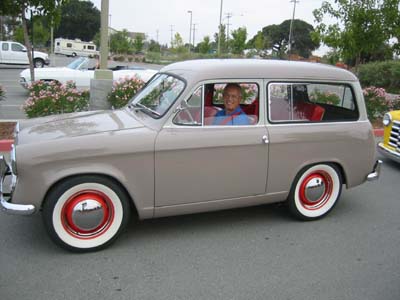
1960 Hillman Husky
My
first upgrade was to put 3.89 gears in the back. I then added an
overdrive. This put a bit of a strain on the original 1390 CC motor so
I swapped in a cast iron head 1725. The next upgrade was to add a Weber
34/36 carburetor. After about 10,000 miles I blew the head gasket so I
decided to put an aluminum cylinder head on it. I found a NOS Holbay
head and added stainless steel exhaust. I was never really satisfied
with this set-up because the Holbay seemed to want to make its power in
the higher RPMS. After about 100 miles I yanked the motor and started
collecting parts to swap in a V8. I bought a Ford crate motor, a 340
horsepower 302. It will be backed by a Ford C4. So far I have already
installed the following parts from a Sunbeam Tiger: leaf springs, 2.88
rear end, and a front cross member with disc brakes.

Currently I
have a 260 block and heads and a C4 to see what kind of cutting will
need to be done. The firewall has been cut out and I have a Tiger
firewall and tranny tunnel to fit the larger engine. About the only
real modifications are the firewall, tunnel, and steering. The rear
cross member for the C4 was a generic tube with a 2" drop. I have a
Tiger steering column that will need to be shortened. I will use the
original steering wheel if possible.
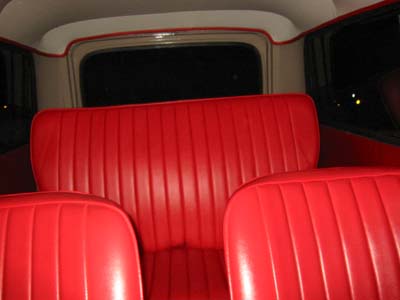
Believe it or not I'm actually a purist at heart so the car
will appear as close to stock as possible. The interior has been redone
in its original red and I even found the correct pinpoint material to
make a new headliner. It looks great with the red piping. I managed to
find lots of NOS parts to finish off the interior including window
cranks, escutcheons, rear view mirror, ignition and lighting switch,
heater control levers, windshield, and vent handles. In the future I'll
repaint the car in the original antelope color.
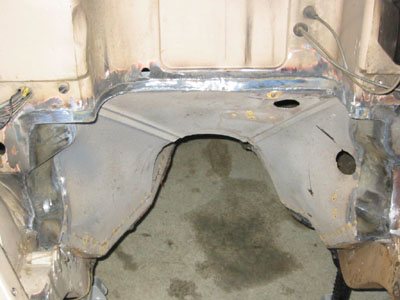
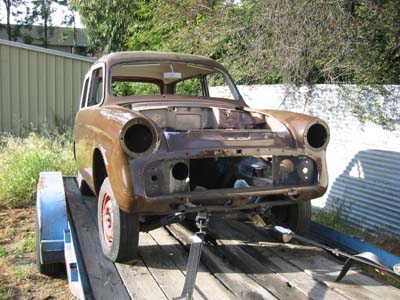
Above is a picture of the Hillman on the way to the
body shop for firewall/tranny tunnel
modification.
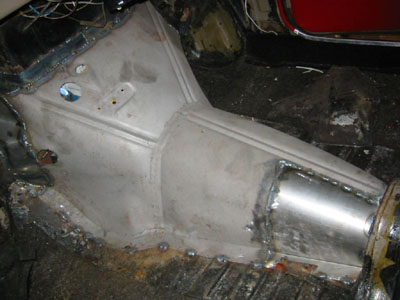
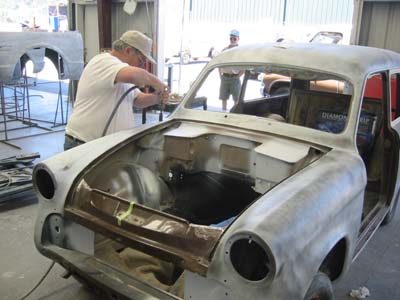
Just got back from the body shop. This
is what the
modified firewall looks like. Now that the dummy engine is out I need
to figure out where the steering goes. As soon as I do that it goes
back to the body shop so they can finish welding the whole thing
together. They will also add a rear upper shock mount so I can use
normal shocks instead of the old lever types.
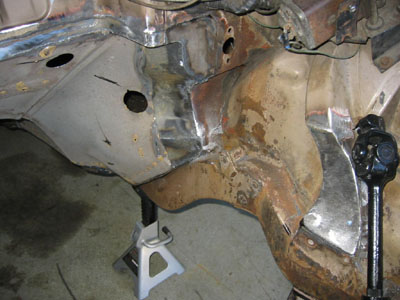
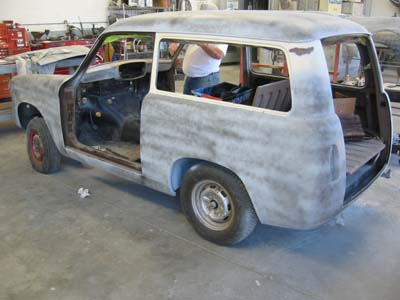
Here is how the Tiger transmission tunnel fits. The only modification
was to eliminate the shifter hole and to add a few inches at the front.
There's still plenty of leg room and the seats retain their original
mounting positions.
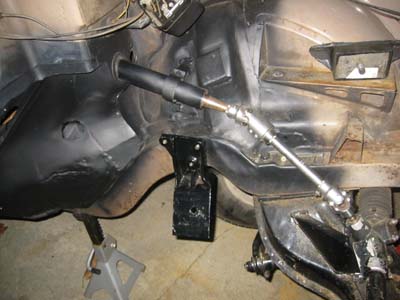
This is how we had to notch the fender support to make room for
the steering u-joints. You can also see the material added to bridge
the gap between the Tiger firewall and the Hillman Firewall. Looks like
we'll need to add a little more sheetmetal to house the steering
column, otherwise it would have to be located too far to the
left. You can see the final position of the steering column. I opted to
use modern
Borgeson U-joints as they are able to handle greater angles than a
stock Tiger unit. In addition,
the top U-joint has a vibration dampener. The whole U-joint assembly
was shorter than the Tiger one
so I was able to use a stock length Tiger steering column. You can also
see how the motor hanger
bolts right up where the Husky steering used to go.
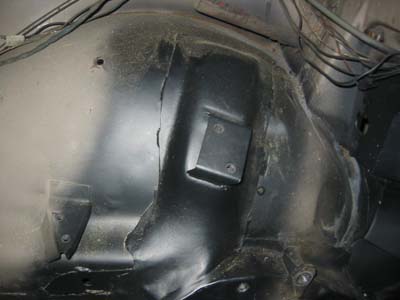
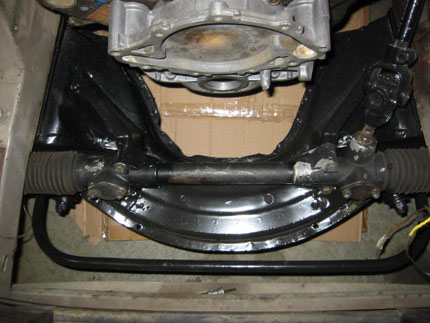
I decided to get rid of the square Husky inner fender supports and
replace them
with lower profile Tiger braces. This was necessary to make room for
the Tiger steering
rack. Shortly after this picture was taken, we removed the squared
piece on the brace that was used to connect the strut to the firewall.
We didn't think this was necessary as the car gained
strength from the roof.
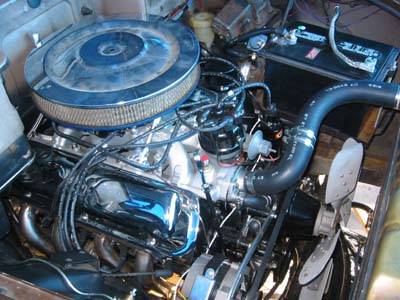
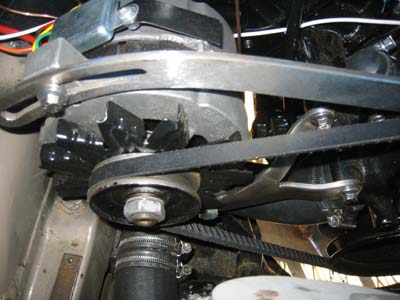
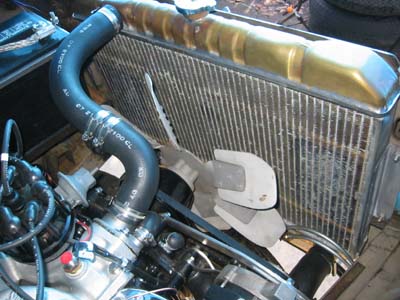
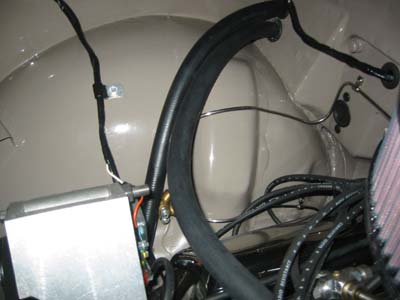
Here is a shot of the engine. I still need to fabricate a spacer
to bring the fan closer to the radiator. We had to fabricate both upper and lower alternator brackets. I don't
really like the positioning as it's a little too close to the frame and
there isn't enough room to pull it
away. It's also too close to the lower radiator hose. I'll probably
mount the alternator much higher which will allow for side to side
adjustment.
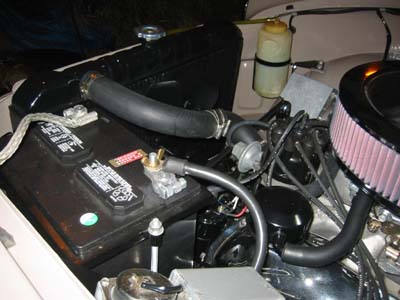
Here Paul Reisentz of Reisentz Restorations and I are firing up the
motor for the first time. I had Peter Economoff of Peterbuilt Radiators in Santa Barbara, CA make
me a 3 row
radiator. I am going to see if I can get by without an electric fan. So
far, it hasn't gotten above
160 degrees. Radiator hoses proved to be a challenge so I just spliced
a couple together. I could have done Cool Flex but I did not like the
look...Plus, I put a Gano Filter in so I needed a splice
anyway.
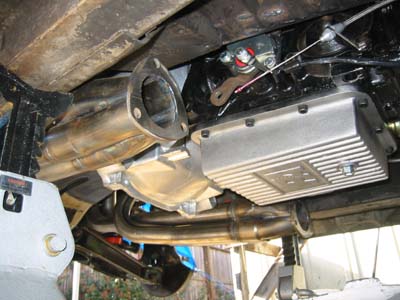
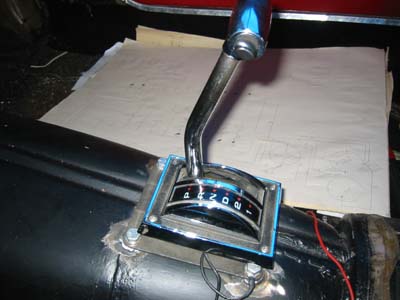
Here you can see the CATT headers and Performance Automatic C4
transmission. A stock Ford Mustang shifter was used and has been wired to light up.
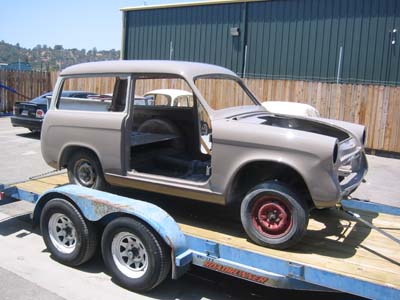
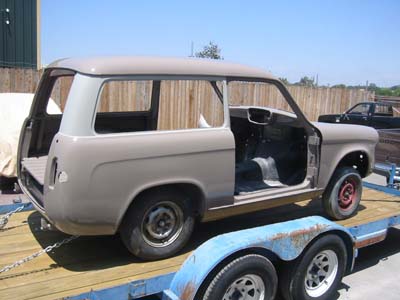
Here it is all stripped down getting ready to go in for paint. Just
for fun I decided to shine up the front fender and it actually looked
pretty good.
The Tiger crossmember was removed for painting and an Alpine unit was
put in its place
just to make it roll.
Tim at Frank's Frame & Body Shop in Valley Springs, CA is
drilling a hole
for the antenna. I found a cool NOS Motorola retractable antenna on
eBay. It retracts
and locks in place. To open it you need a little key which pops it up a
couple inches. I had them fill severals holes in the engine compartment
including the fresh air vents in
the firewall and radiator support. They also filled in the 2 heater
holes. We mounted
a Vintage Air heater/defroster on the passenger side under the dash.
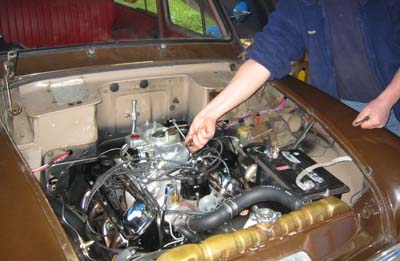
I've made quite a bit of progress on the Hillman project. Most of the
hard work is out of the way. Once we got it running, we could drive it
around and work out the kinks. We took it to A1 Muffler in Morgan Hill,
CA to get the exhaust put on. I used 2 1/4 stainless steel exhaust pipe
and Spintech mufflers. A trip to the alignment shop revealed a bent
spindle so I replaced that and will have to take it back for alignment
later. After driving it for 2 weeks we tore it down for a trip to the
body shop. I never got a chance to really step on it as it really needs
a tune up and would back fire if I gave it too much gas. The 650 Speed
Demon needs some adjusting. I sent out all the trim for plating and
polishing. I got it back and it looks really good. I also sent out the
headers to Jet Hot for coating. Original Husky wheels are getting
widened to 6".
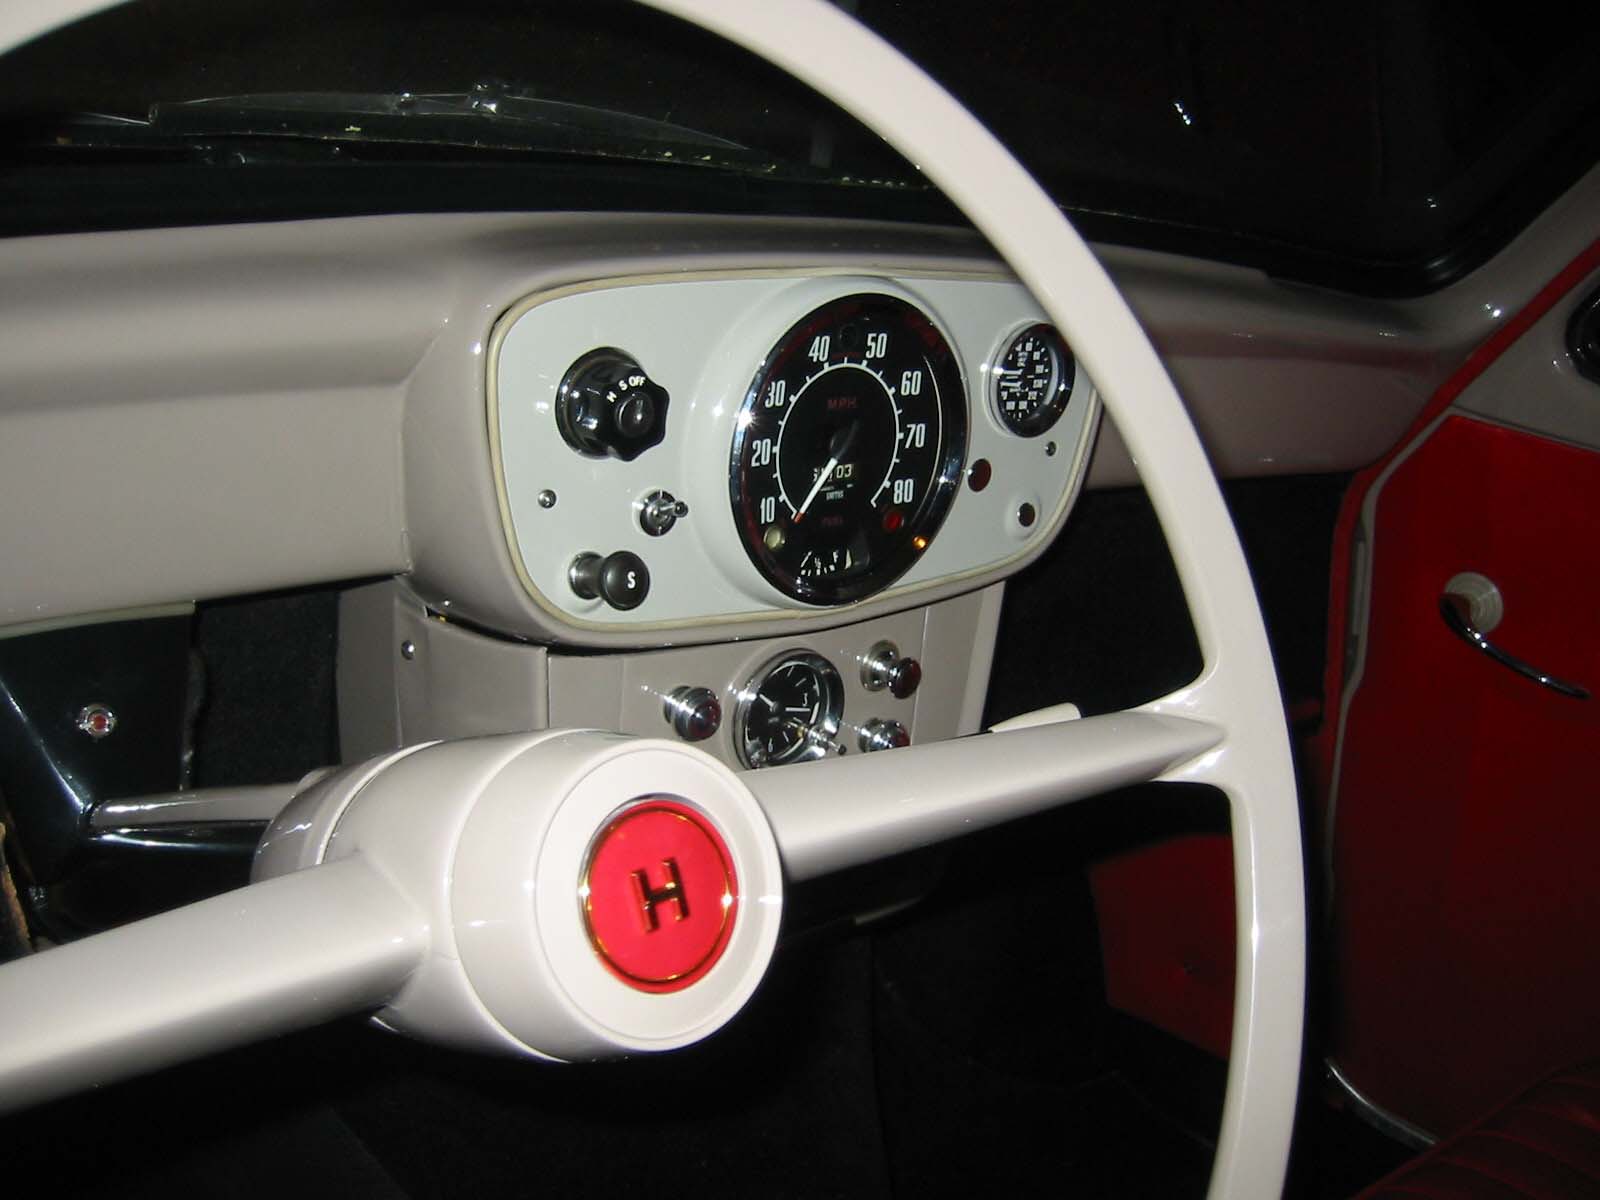
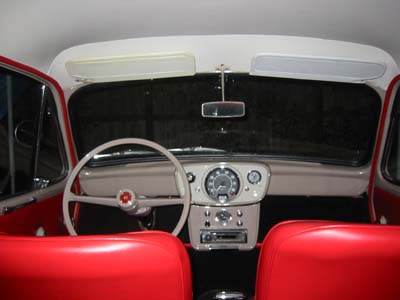
I modified the Tiger steering column to accept the original Husky
steering wheel.

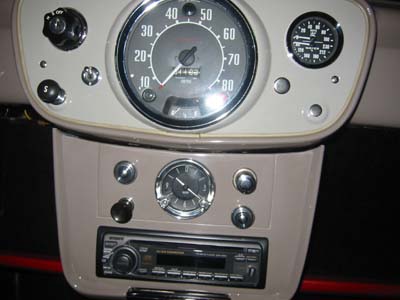

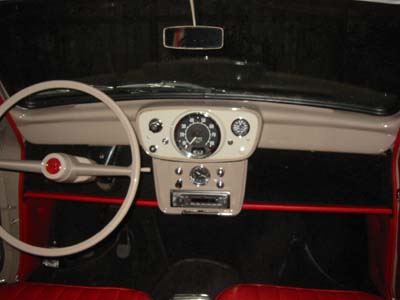
I found the radio console in a junk yard in Fresno. It houses my
radio, original Hillman clock, cigarette lighter, and knobs for the
Vintage Air heater and defroster. The black knob
will be replaced with a matching silver knob. I was testing different
types of knobs.
I installed a combination oil pressure, water temperature gauge in
place of the original Husky water gauge.
If you look carefully at the different pictures you can see the minute
hand on the clock has moved. It works!
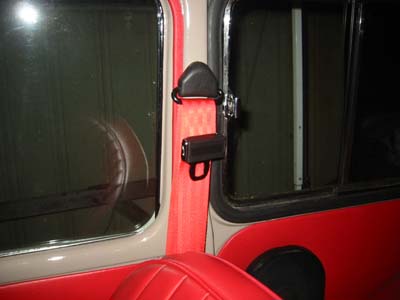
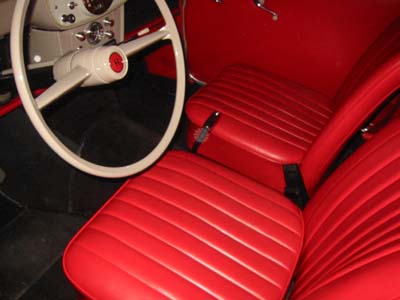
Yes, it is
possible to put 3 point seatbelts in a Hillman!
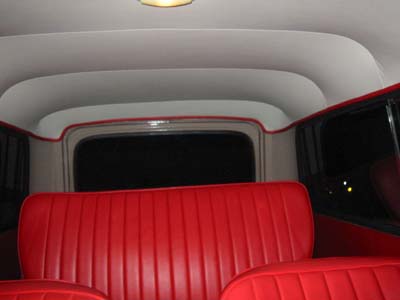
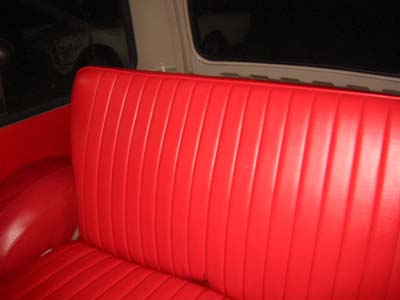
Seats and headliner were done by Martha Christensen of Pro-Prep
Interiors. We were even able
to find the original pinpoint material for the headliner. It's the same
material that is used
on Sunbeam Tiger and Alpine sun visors.
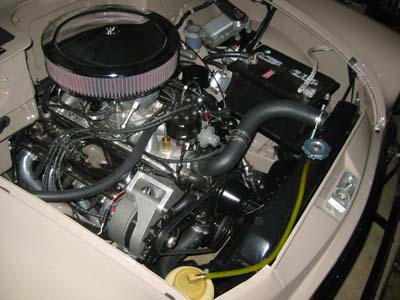
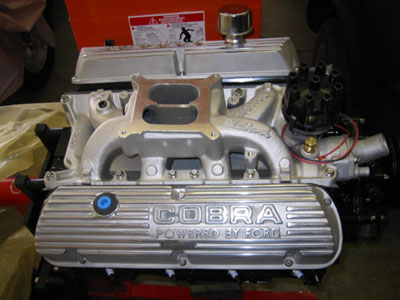
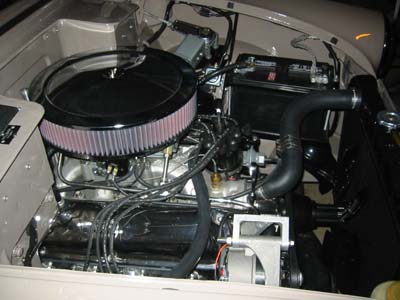
This is what 340 horsepower looks like in a Hillman Husky. The picture
actually makes it look
more crowded than it is. It had more room than a Sunbeam Tiger
especially in the front.
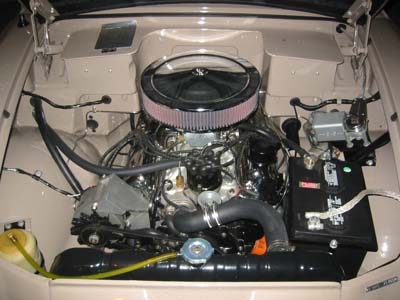
I had to add a spacer to bring the fan closer to the radiator.
Alternator bracket was made by
Paul Reisentz.
Up above you can see the Tiger fender brace that we installed. It gives
more
room than the squared Hillman fender support. This was especially
important to provide
clearance for the Tiger steering column. You can see in the other photo
we used a Rootes washer
bottle as a coolant recovery tank. You can also get a glimpse of the
large radiator built by
Peter Economoff of Peterbuilt Radiators in Santa Barbara. Even in
traffic and summer weather
the car never went above 185 degrees. Battery and wiper motor remain in
their stock location.
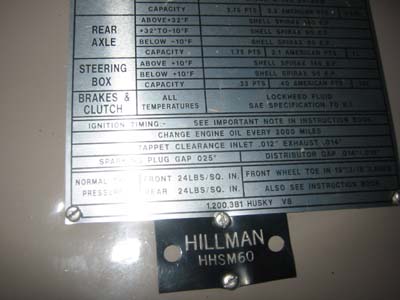
I had a
specification plate made to say Husky V8. I found out later
it should have said Husky Saloon.
My aluminum grill doesn't look very good. I was going to get it chromed but it was too pitted.
Superior Chrome handled all my replating needs.
The BF Goodrich 215/70/15 radials fit nicely. I had the original wheels
widened to 5 inches. Wheel studs were replaced with ARP racing studs.
Stainless steel exhaust exits
just in front of the rear wheels. This makes for a loud car. I
eventually plan on rerouting the exhaust out the back of the car...just
not sure how to do it yet. And here is my dad driving the Husky to the 2004 Taste of Morgan Hill Car Show.
If you have any questions feel free to contact me. doug@dougscars.com
|
