 |
THE GARAGE PROJECT! |
Revised
12/06/02 |
| 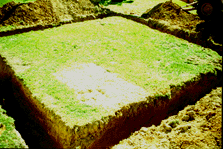 Groundbreaking was on September 23rd, 1998. At first,
I took estimates from General Contractors to do the whole project. The first
estimate was for $17,800 for a 24 X 24 foot one-story garage. The next lowest
bid was $15,500 (After hiding the Cadillac in a neighbor's driveway. After
other similar meetings, I tried a different approach, asking for bids on constructing an
84 Lumber kit. The lowest bid was $11,800 PLUS the $3200 Kit! Groundbreaking was on September 23rd, 1998. At first,
I took estimates from General Contractors to do the whole project. The first
estimate was for $17,800 for a 24 X 24 foot one-story garage. The next lowest
bid was $15,500 (After hiding the Cadillac in a neighbor's driveway. After
other similar meetings, I tried a different approach, asking for bids on constructing an
84 Lumber kit. The lowest bid was $11,800 PLUS the $3200 Kit!
After renovating 5 houses in my
lifetime, I know what a hammer is and how to use it, so I became my own
Contractor. The bid process started over again, just for the foundation work.
The above picture is the result of the best bid.
|
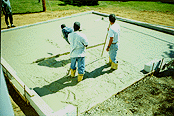
After a week for the footing dig and
pour, block laying, and backfill the slab was poured and finished. Then five days
keeping the slab wet for the initial curing process, which was lengthened even further by
two days of soaking rains - a blessing in diguise. A slab grows in strength over the
initial 30 days - and letting it dry out as slowly as possible ensures that it reaches
it's maximum strengthl. The 84 Lumber kit arrived during the cure period, and
just organizing the materials, both inside the basement of my home and in other strategic
places in the yard took the entire first day.... |
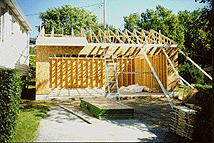
With the exception of having two very
kind neighbors who helped putting up roof trusses, I completed all the work
myself. Being acrophobic (afraid of heights) made the roof work especially
taxing and challenging, even though the trusses were just 5/12 pitch and the total height
a little less than 15 feet. Since the roof trusses had lingered on a grassy slope
for a few days and also suffered two rainfalls, they all were warped! As each piece
of 4 x 8 sheathing was installed, the trusses had to be coaxed into square using pipe
clamps. Hence, two days for the roof sheathing.
|
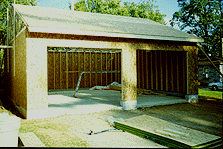
< It's funny how the building feels
different sizes as it goes up. What starts out feeling like a HUGE structure slowly
shrinks as completion nears. Guess that's the way it goes. By the time this
shot was taken, the soreness became a constant companion. Someone explained to me
how acrophobia causes the muscles to tense up, causing a lot of soreness. I believe
it. |
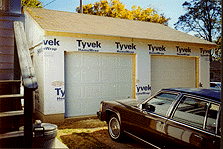
> By the time this photo was taken, it seemed more like a
building - and I was beginning to feel good about taking all the time to do things slow,
but right. Although insulation and wallboard will have to wait for some future year,
I wrapped it up like a house, sealing every crevice, using insulated garage doors, entry
door and a dual pane energy efficient window. The solid sheathing was also an
option - hardboard is the standard for this kit. I wanted stability. |
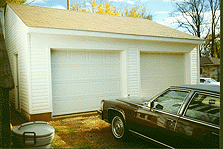
The preparation for siding took 3
days, while the actual siding installation took 3 more days. Since this was the
final "look" of the building, I wanted to do it well. Luckily, my
next door neighbor is a roofing and siding professional, and gave a lot of helpful tips on
hanging the siding and so forth. Good neighbors are hard to find, and can be a
invaluable resource! |
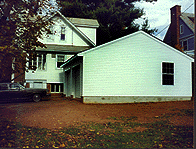
After making it look good on the outside, there was
still lot of work to do on the inside, like extra bracing of the trusses, and coating the
new floor to seal it before use. An Electrical Subcontractor wired it up, due
to local regulations. I got permits for everything.
So what did I save by doing it myself? About
$6.000. The foundation was $4500 and the kit, with options and Tax was
$3,500. The driveway paving was an added $1250 (done in asphalt), but by doing all
the rest myself made it affordable. It took 23 ten to twelve hour days to
complete. The best part is being able to work on my Hillman without having to
deal with Mother Nature!
|
|
|
|
![]()